Tags
boat neck, clothing, DIY, fashion, Free pattern, knit fabric, style, tank top, tutorial
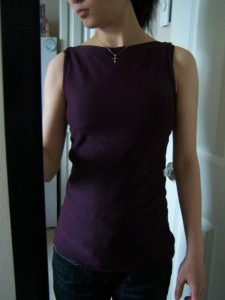
I’ve always been fond of boat-necked tees and tops, but the one that I have is a bit too short. Since I had some spare fabric lying around, I thought- why not make a longer boat-necked tank top myself? Thus began the adventure…
Materials
- 1 m of knit fabric with 5% spandex
- Matching thread
- Snug-fitting t-shirt
Overview
No pattern needed! Sew a boat-necked tank top by making a pattern based on an existing t-shirt that you have. Just make sure your t-shirt is snug-fitting!
Step-by-step
- Find a snug-fitting t-shirt from your wardrobe that is made out of similar material as your fabric. We will be making the pattern for the boat-neck tank top from this t-shirt.

- Lay the t-shirt onto the wrong side of the fabric, and make sure the fabric’s maximum stretch is around the body (horizontal).
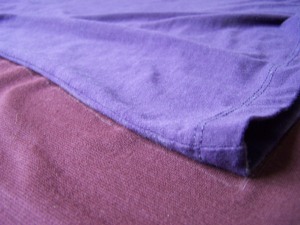

- Using a pencil or chalk, trace around the sides and bottom of the t-shirt. Then, folding back the sleeve, trace around the armholes of the t-shirt (NOT the top of the t-shirt yet).

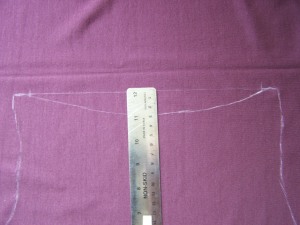
- Then, using a ruler, draw a straight line between the top points of the armhole. On the straight line, make a point (Point A) 2 cm from the left end of the line, and another point (Point B) 2 cm from the right end of the line. Then, find the midpoint of the line you just drew, and measure ~3 cm below the midpoint. This point (3 cm below the midpoint) will be point C. Freehand a curve from point A to point B, passing through point C.

- Now, draw 1.5 cm seam allowances around the bottom, sides, and top of the pattern (NOT the armholes). This piece will be the back of the tank top.


- The front pieces of the tank top will be the same as the back. So pin the pattern you just drew onto a second layer of fabric, and cut both layers together.

- Pin the front and back pieces together at the top, with right sides facing.


- To join the tank top at the shoulders, sew 2cm of stitching (securely) from the left edge to point A, then from the right edge to point B. Unpin fabric and spread out front and back pieces.
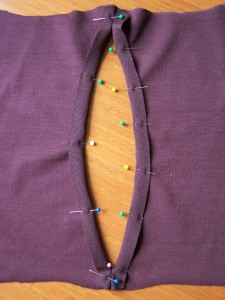

- Fold the top edge down (on the wrong side) and top stitch for both the front and back pieces (you may want to fold the edge down a bit farther for the front piece).

- Measure around the arm holes, and cut out 2 pieces of fabric with 3 cm width and enough length to go around the arm hole. Make sure the maximum stretch of the fabric is along the length of the pieces.
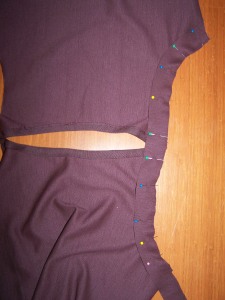
- Line up the edge of the fabric piece with the edge of the arm hole, so that the right side of the fabric piece is facing the wrong side of the tank top. Stitch in place 0.5 cm from the edge.
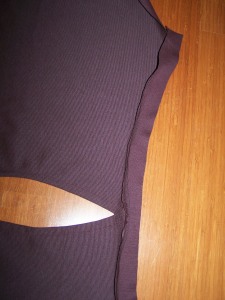

- Then fold the fabric piece over the edge of the armhole, and fold it onto itself again, so that the fabric piece makes a casing around the armhole, and raw edges are tucked in. Top stitch the fabric piece.


- Pin the pieces together again, at the side edges. Sew the sides together. Hem the bottom of the tank top.

- Optional: sew a custom printed clothing label onto the side seam of the tank top~
* If you are unsure about the fit of the tank top, baste stitch first along the sides and top; try it on and make adjustments before completing the final stitching.
Enjoy!
Betty
Soli Deo Gloria


Pingback: Mad Men Dress Part 4 | beaglesbagelsandbuttons
thank you so much this was incredibly helpful
Thank you!! Very helpful and informative and I’m very grateful for the pix–they help a TON!!! ^_^
Thanks for the tutorial this was very helpful. I love boatneck style tops. Here’s mine (I made mine a dress by following on from your example and drawing round a skirt that fitted nicely to finish off the bottom half). The fabric cost £1.50 so I’m very pleased with the result.
http://s6.photobucket.com/user/esthomizzy/library/2014/Dressmaking
Hi Elmy,
Thanks for leaving a comment and sharing a photo of your dress! It looks great =)
Betty
Hi thanks for that. I am searching for a breton Tshirt pattern. Must have slask neck and drop shoulders. So all i need now is how to cut sleeves
This is exactly what I was looking for. It’s so difficult to find this style of top, in the colours I want. Now I just need to find the fabric and be prepared to learn a lot because will need to sew it by hand.