DIY Christmas Tree: 2020 COVID Style

Tags

, , , , , ,

So, Christmas looks a little different this year in 2020.

This is my attempt at capturing absurdity of this memorable year in the form of a Christmas tree (referencing the panic buying and shortage of toilet paper at the beginning of the pandemic).

Currently, in Canada and in many parts of the world, COVID-19 has resulted in strict restrictions on social gatherings, limits on non-essential travels, and shut down of many non-essential services. Christmas will undoubtedly look and feel different this year. With the absence of the usual festivities and gatherings, Christmas this year will probably unsettle us with its absence of face to face social connections and challenges of social isolation.

The humor behind the creation of this tree notwithstanding, let’s make room to process, and even grieve, the sense of loss of social connection this Christmas season, while reaching out to those around us as best as we can.

Let’s make room, as well, to still allow the true hope of Christmas to shine through.

Perhaps, in our unmet expectations and discomfort with change this year, we can better grasp how the birth of Jesus shattered expectations and challenged comforts in so many ways that first Christmas.

Perhaps, in our yearning towards the end of social distancing, we can rejoice more gratefully in the God who ended social distancing with us once and for all that first Christmas- by coming near in His Son Jesus.

Merry Christmas and take care this season.

Betty

Soli Deo Gloria

Instructions are below if you have some extra toilet paper around the house (I bet most of us have stocked up now!) and want to make a DIY Christmas tree, 2020 Covid Style.

Materials Needed

  • 14 rolls of toilet paper
  • Mini-Christmas ornaments of your choice
  • Large Christmas bulb or star
  • Nativity set of your choice
  • Mini-present(s)

Directions & Tips

  1. Place 4 rolls of toilet paper side-by-side, with 1-2 cm gaps in between as the first layer for the tree. Then place another 4 rolls on top, with no gaps in between. Continue making more layers with 3 rolls, 2 rolls, then 1 roll at the top.
  2. Decorate your tree with mini Christmas ornaments of your choice. The sides of the tree has nice ledges for placing small ornaments. Tip: to avoid using tape and damaging the precious toilet paper, the strings of hanging ornaments can easily be tucked in-between the stacked toilet paper rolls. The weight of the toilet paper rolls will keep most light ornaments from falling down.
  3. Top the tree with a large Christmas bulb or star.
  4. Place nativity scene and mini-presents in front of the tree.

Creative DIY Party Decor for Under $20

Tags

, , , , , , , ,

Grad Banquet Decor CollageEvery year, my church hosts a graduation banquet to honor the grads among us. This year, I was in charge of the decoration plan, on a budget of $20! Despite the seemingly impossible task of creating an elegant and cohesive decor plan on such a budget, I jumped at the opportunity to be resourceful and creative in decorating. Here’s the ideas board I created:

Banquet IdeasFlowers/Plants

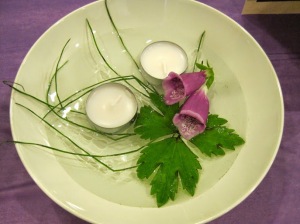
After brainstorming many ideas and estimating which decorations would consume which part of the budget, I realized that it would not be within our budget to purchase flowers. However, flowers add such elegant touch and natural beauty to the decor that I was reluctant to leave them out. Solution? Wild flowers! While driving on the highway, I noticed sporadic clusters of gorgeous purple foxglove just starting to bloom. So instead of purchasing flowers, I decided to gather wild flowers (on the day of the banquet).

DSC_3206One unforeseen issue that arose with these flowers was ANTS. These purple bell shaped flowers were the perfect hiding place for critters, especially ants. So if you choose the option of wild flowers, definitely leave them outside for a bit and shake them out well before bringing them inside.

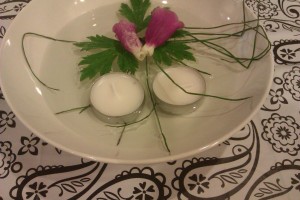
In addition to the foxglove, I also gathered some interestingly-shaped broad leaves, and grass-like leaves for the center piece.

IMG_8313IMAG3958


Colour scheme

Once I decided upon the flowers, that gave me the starting point for my colour scheme. Aside from purple, I just wanted the rest of the decor to be more neutral shades (eg. black, white, silver).

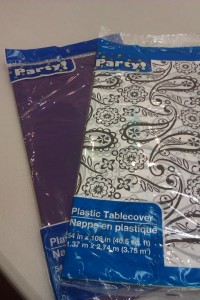
When I went to the dollar store to look for tablecloths, I found purple tablecloth, and also saw a tablecloth with an elegant black and white pattern. I decided that I could cut the black and white tablecloth to make table runners.

IMAG3954Photo booth

Aside from the table decor, I wanted to create a graduation-themed photo booth where people can take photos to remember this year’s graduation banquet.

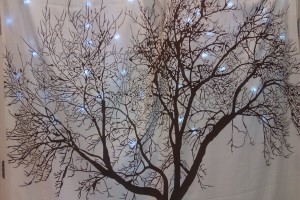
While shopping at a garage sale, a lady was selling a fabric shower curtain with a beautiful tree silhouette design. I thought that it would be the perfect backdrop for the photo booth. I also added Christmas lights behind the shower curtain to provide the feel of glimmering blossoms on the trees.

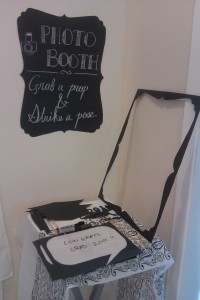
IMAG3964For the photo booth props, I decided to create my own, using black poster paper and skewers. After cutting out a frame, I also had the perfect shape for a photo booth sign!

IMAG3962Overall, people enjoyed the picture-taking opportunity and used the props in various ways!

DSC_3336 Class of 2014 Banner

At the entrance, I also wanted to create a welcome banner with “Class of 2014” on it. For the banner, I consulted tutorials like this one. Except instead of buying letters, I enlarged the words in Microsoft Word, formatted the words so that the fill was white and outline was black, and then printed and cut out the letters on white and black paper.

IMG_8309

PowerPoint

I figured that the easiest and most effective way of adding “wall” decoration would be to create PowerPoint slides that match the decor theme and also briefly introduces the grads. I had the PowerPoint looping automatically as people walked in and settled down.Grad Banquet PPT

Cost

Aside from the materials I already had on hand (construction paper, string, vases, bowls, candles, ribbon, Christmas lights), here’s what I spent:

$11.50- Tablecloths (6 purple, 2 black and white)
$1.50- 2 Black poster boards
$3- Balloons (1 pack purple, 1 pack silver)
$2- Tree silhouette Shower Curtain
$1.50- Skewers
———————————————————–
$19.50- TOTAL

I hope that if you are planning a party of your own, you will be able to gather some ideas from this post- happy decorating!

Betty

Soli Deo Gloria

Free Templates and Tutorial for 3D Staircase Birthday Card

Tags

, , , , , , , , , ,

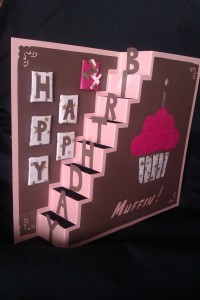
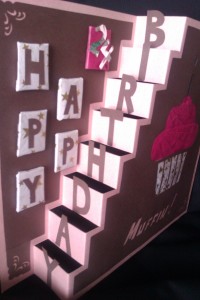
IMAG3630A while ago, I came upon Jay Jay’s inspiring card-making website full of ideas for different styles of cards as well as free templates. Granted, I had to use Google Translator to actually understand the German annotations I was reading. But after that, I was bursting with new inspiration. Since it was a dear friend’s birthday a few weeks ago, I thought it would be a perfect occasion to translate some of those ideas into reality. I decided to make a 3D staircase card with an iris folding pattern for a birthday cupcake.

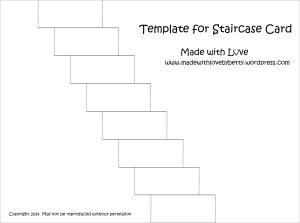
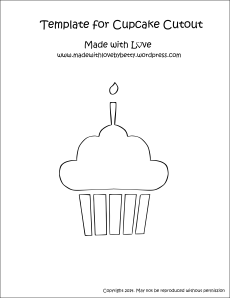
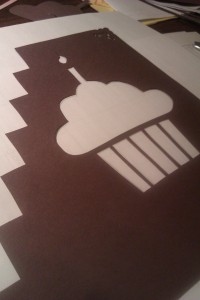
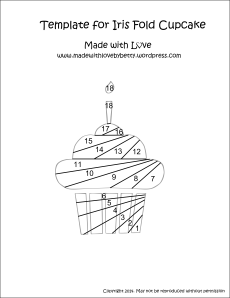
In Jay Jay’s version, there are 5 steps to the vertical staircase. However, I created my own 8-step version so that the 8 letters of “birthday” would fit on it. I made the base of the card with light pink card-stock by cutting along the solid lines and scoring/folding along the dotted lines.Staircase Card TemplateWhen it came time for the cupcake, I tried to find an existing iris folding pattern for it. But most templates I found had swirl patterns that resembled camera lenses instead of cupcake icing, and felt strangely dissatisfying. So I set out to create my own cupcake cutout and iris folding pattern.

Cupcake Cutout TemplateIMAG3624Cupcake Iris Fold Template  IMAG3636


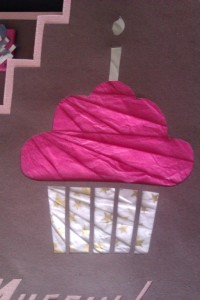
If you are unfamiliar with the conventions of iris folding, please refer to my previous post for more details or browse a great resource by Anne Hayward here. I used white tissue paper with gold star patterns for the paper cup, bright pink tissue paper for the icing, and shiny silver foil for the candle. If I were to make this again I would probably choose a less wrinkly paper for the icing.

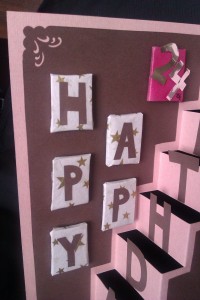
For the rest of the card, I just coordinated colors and decorated. I used the white and pink tissue papers again to wrap small cardboard rectangles, which gave the letters in the word “HAPPY” some nice 3D effect. I also had a swirly corner punch on hand, which provided a nice elegant touch.IMAG3631And… that’s it! I’ve also uploaded a Word version of all 3 templates if needed. Please let me know in the comments if you have any questions!

Take care,

Betty

Soli Deo Gloria

IMAG3633


SIMPLEST way to make and assemble bacon roses

Tags

, , , , ,

IMAG3313I’m not sure who invented bacon roses, but it’s such a neat DIY gift idea that combines aesthetic appeal with delicious practicality. I decided to give it a try for Valentine’s day, but it would make a nice little surprise for any occasion or “just because”!

After browsing a few tutorials on how to make these delectable creations, I settled on tweaking the tutorial by Our Best Bites. I appreciated the simplicity of the bacon-rose-making process: I already had (almost) all the materials needed in my kitchen.

IMAG3306The only part which I tweaked was in the assembly of the bacon roses- I did not have plastic flower stems hanging around the house, nor did the prospect of sticking food onto plastic stems seem particularly appealing.

Instead, I decided to borrow a trick learned from observing how caters presented skewered shrimps- by sticking them onto an orange! This would give the bacon roses a bouquet-like shape, all the while using materials I already had and keeping everything “food-friendly”.IMAG3308The assembly was very easy- I just poked one end of the toothpick into each bacon rose, then poked the other end of the toothpick into the orange. I also cut the bottom of the orange flat so it would stand properly.

Voilà! Let me know if you have any questions or comments!

Betty

Soli Deo Gloria

DIY Upcycled Greeting Card- Merry Christmas!

Tags

, , , , , ,

Image

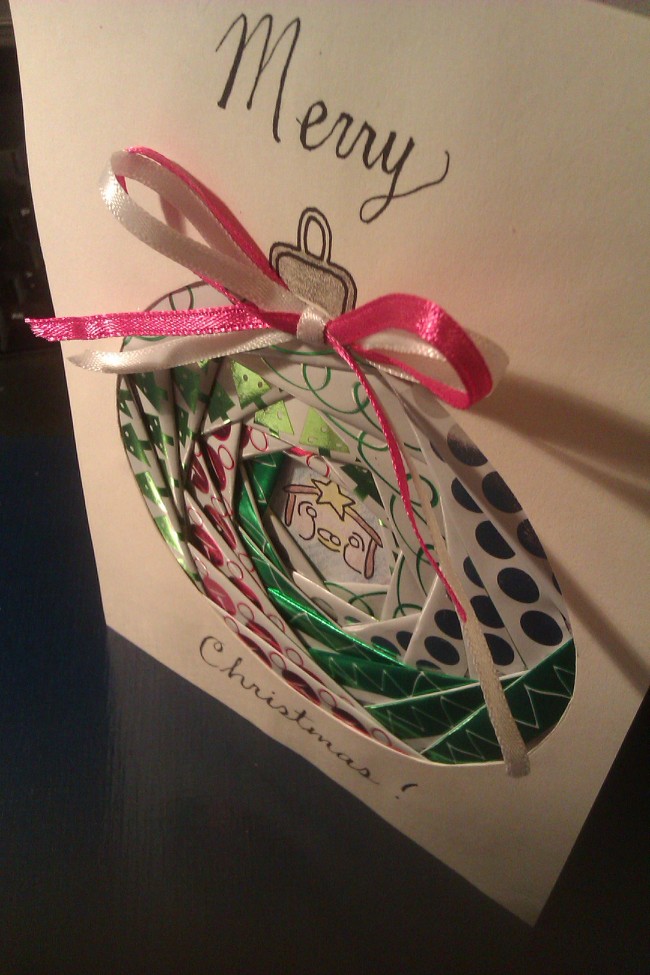
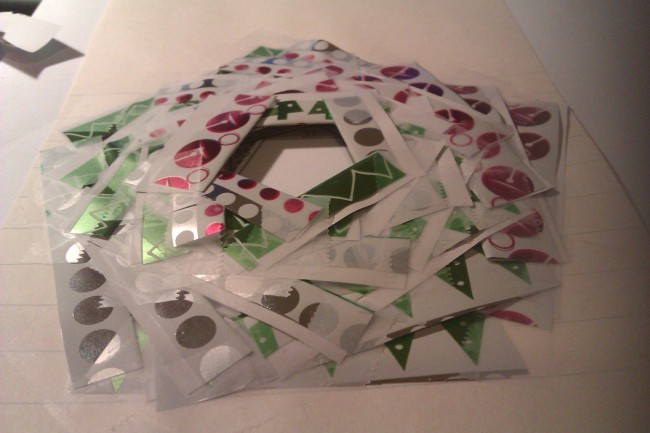
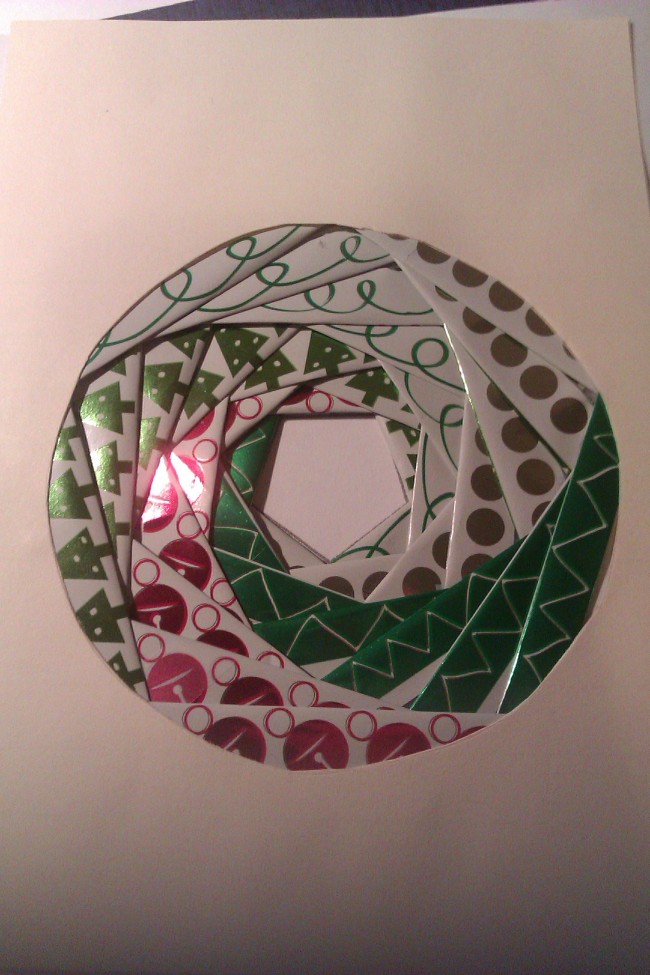
Card-making has always been a hobby, so I’ve made my share of greeting cards in the past. This year, I was looking for fresh ideas and creative designs to add to my card-making repertoire, and I finally found an idea worth investigating: iris folding. “Iris folding is a paper craft technique that involves folding strips of colored paper in such a way to form a spiraling design. The center of the design forms an iris — similar to the shape of the iris of a camera lens.” This definition is from Anne Hayward’s website, which also has a variety of tutorials and patterns for making different designs using iris folding. The pattern that I used can be found here.

ImageImage

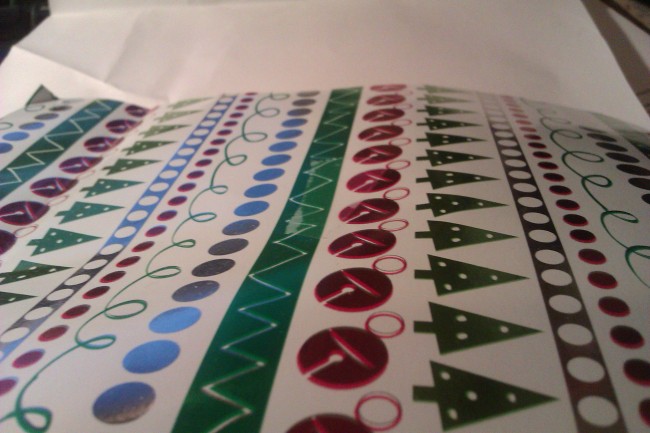
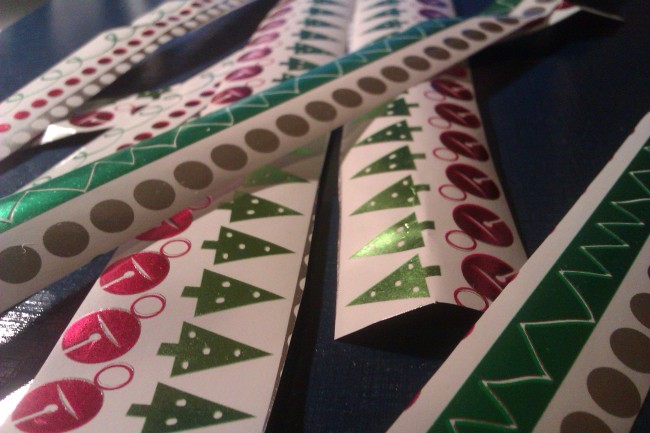
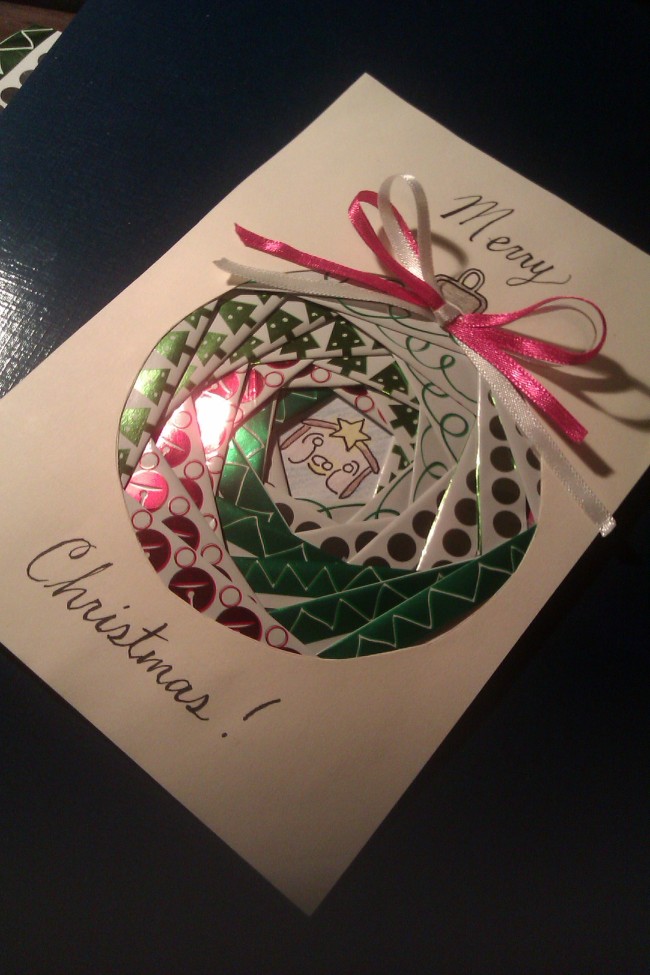
Since I had lots of wrapping paper lying around, I thought that this would also be the perfect upcycling project- turning old wrapping paper into handcrafted cards! The design of this particular piece of wrapping paper was especially suitable for this craft- I was able to get 5 different patterns out of it! The iris folding process itself is fairly straightforward- the time consuming part was in cutting and taping all the paper strips down. The project took about one hour, and I am quite content with the results!

Image

Back of the card

ImageImage

For the middle of the ornament, you can put a button, embellishment, or other decorations. However, I decided to draw a mini-version of a nativity scene. Jesus, after all, is the “reason for the season”, so He is at the heart of my ornament =)

Merry Christmas!

Betty

Soli Deo Gloria

DIY “Rook-ie” Costume Idea: Chess Piece

Tags

, , , , , ,

Image

Image


Although not a fan of the scary and grotesque imagery often associated with Halloween, I don’t mind dressing up; in fact, I actually enjoy the creativity that some teachers/students put into their costumes.

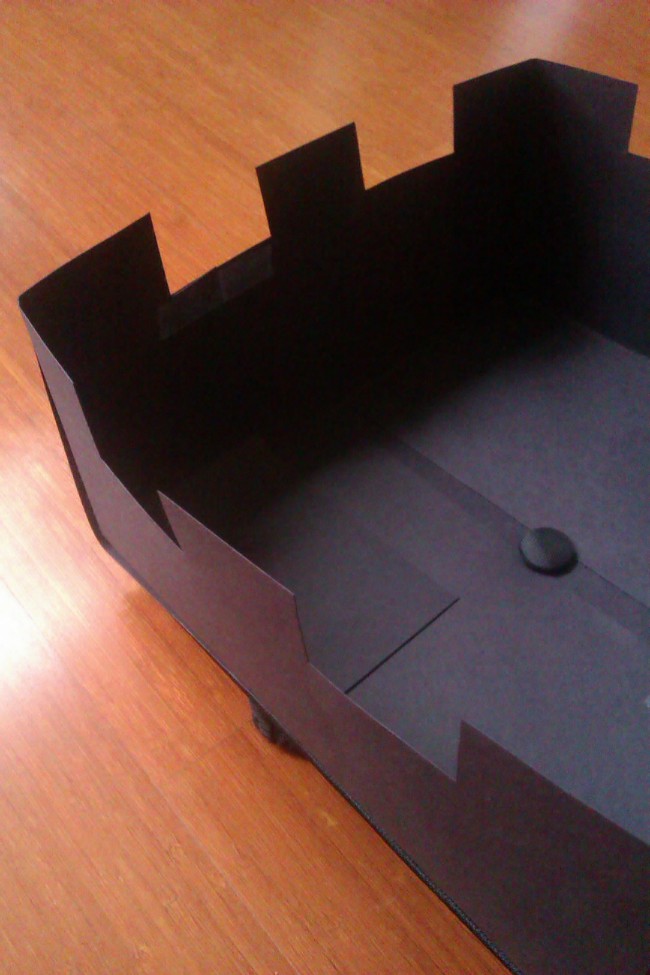
This year, I decided to be a chess piece: a rook/castle. I used poster paper to create the upper part of the castle, and attached it to a graduation cap that I had around the house. Add a chessboard, and the costume is complete. Almost all the students and teachers figured out what my costume was =)

If you are looking for a simple costume idea, keep this in mind for next year!

Betty

Soli Deo Gloria

Busy Bee

Bzzzzz… I think I got stung by the busy bee! The past month has definitely been a bit of a whirlwind, with me starting the teacher education program, juggling 9 courses, and now, also starting my practicum. Unfortunately I do not foresee myself having much time to attempt crafts, so this blog will have to take some vacation time. But [terminator voice] I will be back!! =P

Betty

Soli Deo Gloria

Cowl Neck Ruched Top Tutorial and Free Pattern

Tags

, , , , , , , ,

While deciding what to do with the leftover fabric from a convertible dress, I had several ideas and considerations:

  1. I bought some leggings a while ago, but am still lacking a semi-long top to wear them with
  2. I really like cowl neck tops
  3. Ruching looks fun to try and I also like the idea of ruched side seams

Combining all 3 considerations, the idea for this semi-long cowl neck ruched top was born =)

My original intention was actually to make a long-sleeved top. But as we all know, things don’t always turn out as planned! After tracing the front and back pieces for the torso, I felt like there was still a lot of fabric left, so I went ahead and merrily traced out the first long sleeve. It was only after I already cut out the first sleeve, that I realized, oh NO! I don’t have enough fabric to make the second long sleeve! o_O Imagine the ridiculousness of one arm having a long sleeve and the other arm having no sleeve (what a fashion statement that will be haha). In the end, there was just enough fabric to make the second sleeve a short sleeve, so the first long sleeve got cut into a short sleeve too. These sorts of things definitely help to keep me humble in my sewing endeavors- thank God for that!

Overview

I examined a couple of cowl neck tops I already had, and tried to figure out an easy way to make the pattern. The cowl neck is produced by tracing the pattern from a regular top, and modifying the front piece.

Materials

  • At least 1m x 1.5 m of stretch knit fabric
  • Matching thread
  • 1.8 m of ¼’’ elastic
  • Snug fitting v-neck tee
  • 15 cm of bias tape (optional)

Step-by-step

  1. Use a snugly fitting long-sleeve V-neck tee as the template. For the front piece of the cowl necked top, first trace armhole and shoulder of the front piece onto a piece of paper, and cut out.
  2. Trace the side and bottom edges of the tee onto the fabric (lengthen the torso part if you want to make the top semi-long; also make the torso longer than desired length if you want to add ruching to the side seams. Ruching shortens the top.).
  3. Place the paper cutout where it would normally be on the tee, and using the armpit point as the vertex, rotate the paper cutout outward toward the sleeve (counterclockwise for the left side, clockwise for the right side). The more you rotate, the lower the cowl neck would hang, I rotated it by about 30 degrees. Trace the new armhole and shoulder positions onto the fabric.
  4. Then, extend the shoulder line by 3 cm (green dot to blue dot), as the fabric will be gathered slightly at the shoulders for the front piece.
  5. Repeat step 3 for the other armhole/shoulder.
  6. Then, draw a straight line (neck line) to connect the shoulder endpoints (blue dot to blue dot).
  7. Then, Using the neckline as the line of symmetry, draw the mirror image of the green dot, and connect the second green dot to the blue dot.
  8. Use a free-handed arc to connect the uppermost green dots. The cowl neck does not have a top stitched neckline, but has a hidden flap hanging inside the shirt to create the neckline; so the extra section at the top (with the arc) is that hidden flap.
  9. Trace the back piece of the torso onto the fabric, and extend the length of the bottom if you like. Cut out with seam allowances.
  10. Measure the length of the neck opening for the back piece, and cut out a strip of fabric that has the same length, and 3 cm width (neck piece). This will be used later to finish off the neck opening for the back piece.
  11. Trace the sleeves onto the fabric, draw seam allowances where there are seams, and cut out.
  12. Now the sewing. Sew the back piece with the neck piece at the neck line, with right sides facing. Turn the neck piece so that its wrong side is facing the wrong side of the back piece; tuck in the raw edge of the neck piece and top stitch. Encase a clear non-stretch ribbon into the edge of the back neck opening, if desired, to prevent stretching.
  13. Using zigzag stitch or a Serger, sew along the curved arc of the front piece. Tip: if you pull the stretch knit fabric while sewing, it will roll slightly at the edge; so even the zig-zag stitch gives it a nice finished edge.
  14. Gather the shoulder part of the front piece, so that it’s the same length as the shoulder part of the back piece. The right sides of the front at back pieces should be facing.
  15. Fold the fabric at the front neckline (line of symmetry), so that the mirror image of the shoulder lines and the shoulder lines are aligned (green dots).
  16. Then sew at the shoulder line. Also add bias tape with the shoulder seam if desired.
  17. After sewing the shoulder seam, flip the hidden flap so that it is folded onto the front piece. This is how it should look like so far.
  18. Sew the sleeve onto the armhole of the front + back pieces.
  19. Sew the seam of the sleeve along wide the side seams of the torso.
  20. To add a bit of ruching to the side of the sleeves, pin 5 cm of elastic so that it spans 7-8 cm of fabric. Stretch the elastic when sewing.
  21. Hem the sleeve openings and the bottom hem.
  22. To add ruching to the side seams, first measure the distance between your armpit and where you want the bottom hem to be. This is how long you should cut the elastic. Then, pin the elastic at the armpit, and at the bottom hem. Stretch the elastic as you sew, and sew along the side seams again. There you have it! Even if the top is semi-long, you can always fold the bottom hem inside to make it regular length when you wear it =)

Please let me know if you need clarifications for any of the steps~

Enjoy!

Betty

Soli Deo Gloria

Ruched Fabric Flower Tutorial

Tags

, , , , , ,

I still have quite a bit of purple knit fabric leftover from my other projects… so this ruched fabric flower seemed like a good idea and a great hair accessory to match my other purple garments =)

Overview

Simple gathered stitches produce this beautiful flower.

Materials

  • Fabric scrap (I used a piece which is 8cm x 48 cm; but any size can be used, as long as the length is 6 times the width)
  • Safety pin
  • Matching thread

Step-by-step

These steps were adapted from the tutorial by Rose Rushbrooke.

  1. Lay the fabric wrong side up, and fold the raw edges toward the middle (lengthwise); pin in place. This picture shows a segment of the fabric strip.
  2. Flip the fabric over, and using pencil/chalk, draw 6 zigzags on the front of the fabric. The zigzags should have 90 degree angle corners. Sew along the zigzag lines, pulling the thread taunt to gather the fabric.
  3. Arrange the fabric in the shape of a flower, and make stitches to secure the overlapped ends and create the shape of the flower. Sew a safety pin onto the back. I like sewing safety pins onto the back of flowers, as the safety pin allows the flower to be pinned onto clothing, and also a hair clip can easily be slid onto the safety pin to pin into my hair.

Enjoy!

Betty

Although I love pretty things (eg. flowers, crafts, ribbons, anything shiny)… sometimes I do find myself getting a bit too obsessed over them and spending too much time browsing ideas or planning future projects. It’s in these times that God reminds me of my priorities. Though these pretty things will one day become tattered or grow out of style, there are some things that will not fade away: God’s love, His Word, and the work of character that He seeks to build in me. Thus I am reminded to set my heart on the important and the eternal, rather than let all my energy and time be consumed by what is temporal and trivial.

The grass withers and the flowers fall, but the word of our God stands forever. ~Isaiah 40:8

Soli Deo Gloria